In this post, we’ll answer the question, “What is a clipping mask in Illustrator?” We’ll also discuss how to create one. It will be a simple explanation you will understand, even if you aren’t tech-savvy.
A clipping mask is utilized to make designs eye-catching and unique. It’s one of the basic processes in Illustrator. So, without further ado, let’s explain the meaning, uses and techniques for creating clipping masks in Illustrator. Keep scrolling down!
What Is Clipping Mask
Before explaining how to create a clipping mask in Illustrator, let’s define what a clipping mask is.
A clipping mask comprises an object whose shape masks other objects or artwork, ensuring that only the areas within the shape remain visible. It ensures the artwork is clipped to the mask’s shape.
What is a clipping set? It refers to the clipping mask, and masked object.
Why Is Clipping Mask Utilized?
From the name, you can decipher the use of a clipping mask. Its primary use is to cut off objects. It serves as a window that allows us to view objects within the clipping path.
In other words, even if you prepare two or more objects on the artboard, only those within the clipping mask will be visible.
Here are a couple of things you should know about clipping masks.
- The first thing you need to know is that the clipping path should always be on top of the object you’re clipping.
- You can clip one or multiple objects
- You can’t have more than one clipping path
- Clipped objects should be in the same group or layer
How Graphic Designers Utilize Clipping Mask
Clipping masks help improve designs. Adobe originally developed the tool to put patterns in shapes. For instance, you can draw a pinstriped tie by utilizing the tie’s shape as a mask.
So, the clipping mask tool is an important tool in graphics design and editing. You can use it for a range of design tasks, as follows.
Creation of covers for books, music albums, magazines, posters and more:
There is so much you can create with a clipping mask in Illustrator. These include covers for magazines, posters, including covers for music albums, and books. You can create cover designs that will sweep people off their feet.
Creation of social media advert covers:
Using a clipping mask in Illustrator, you can create social media ad covers to capture a wider audience and make your brand the talk of the town. Win more clients, record more revenue and grow your business.
Ads with captivating visuals have more impact in marketing. They capture more audiences and increase their interest in a brand.
Improves your collages:
Clipping masks in Illustrator will improve your collages. It will take your collages to a whole new level, helping you create exceptional transitions from image to image.
For instance, you can create a torn poster’s effect, displaying another image underneath it. That’s how useful clipping masks in Illustrator can be. It helps take the job designers do to another level.
Create a unique brand identity:
Branding is crucial in business. Thankfully, clipping masks make branding businesses a breeze. You can use it to create a unique brand identity that will make your brand easily recognizable worldwide.
Breathe life into your ideas:
Clipping masks gives you the freedom to create something spectacular. It lets you breathe life into your ideas. You can transform portraits into unimaginable designs. Bring your ideas to life.
Tips You Need To Know About Clipping Mask In Illustrator
Let’s discuss some crucial tips before diving into how to use clipping masks in Illustrator. These are tips you may already know if you have massive experience using clipping masks.
You can edit a clipping mask in Illustrator if you are not satisfied with the clipping area. Just go to Object > Clipping Mask > Edit Content. You can even move the image below and display the desired area.
Note that a clipping path should be a vector. For instance, if you fill the text using an image background, here’s the first thing you must do. Outline the text. The next step is to create a clipping mask. Consider doing this if the clipping mask in Illustrator isn’t working.
The key or shortcut for clipping mask is Command + Option + G (macOS) or Control + Alt + G (in the Windows operating system). Here are other alternatives you can try. Press Option (macOS) and hold it down. For Windows, hold down Alt and hover the mouse between two top layers in the layer panel. Look out for a downward arrow. Once it appears, click on it to apply the mask.
A layer mask utilizes white and black to display and hide different areas of the layer. But the clipping mask is different. It utilizes the Content and transparency of one layer to control another layer’s visibility. So, we require two layers to create a clipping mask. The bottom layer controls the visibility of the layer above it.
A clipping mask differs from a clipping layer. However, the difference depends on the effect you’re hoping to obtain. You can deploy a layer mask or clipping mask. The difference is that the layer mask controls the visibility of the layers to which it is applied. On the other hand, the clipping mask makes it possible to create a mask by clipping one or more layers to another layer or a layer group underneath.
How You Can Combine Layer Modes And Clipping Mask
Have you thought about combining clipping masks and layer modes? The result is mind-blowing if done correctly. One of the benefits of this combination is that it allows you to create complex patterns and shapes without adjusting the original layers.
Clipping mask allows you to cut out shapes from varied layers, and layer modes blend the shapes. For instance, you can utilize a shape layer as your clipping mask to create an object’s silhouette and then utilize an image layer as another clipping mask to fill in the textures and details of the object.
It is possible to change the layer mode of the image layer to create different effects, including making the object appear more realistic, colorful, stylized, and abstract.
How To Create Clipping Mask In Illustrator
This section explains how you can make a clipping mask in Illustrator. Note that you can only utilize vector objects. However, you can use another vector object and a raster one inside. You can even deploy different things.
Below, we will create a clipping mask in Illustrator to explain the process better. Read on!
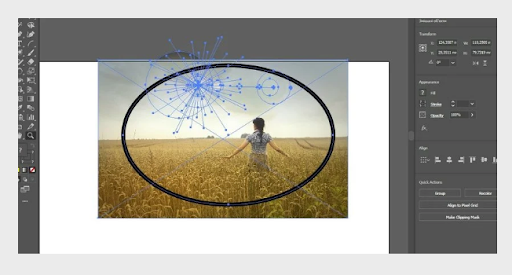
You can see what we did here. We selected a random bitmap from a computer and created a vector flare.
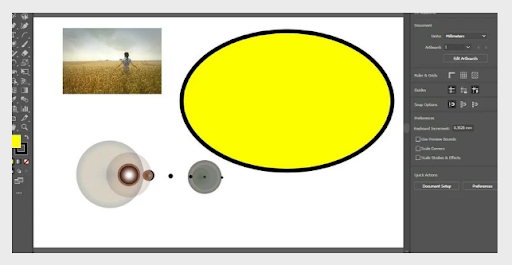
Please note that you can add the bitmap to the artboard via various means. You can drag it from Explorer or anywhere you wish. In this case, we dragged mine from Explorer.
A Handy Tip: There are diverse vital rules to follow when using a clipping mask in Illustrator.
What are the rules? Firstly, ensure you place the clipping mask on top of the objects you plan to place inside.
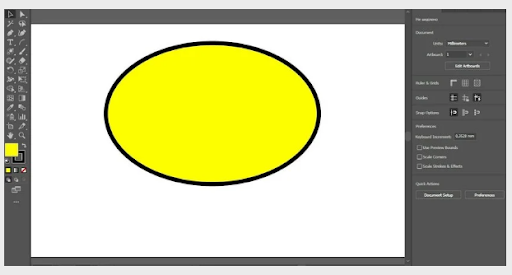
Go to the layers panel, then drag the ellipse up. Get the fill-off for clarity purposes.
Prepare to clip. In this case, you have to select all the objects.
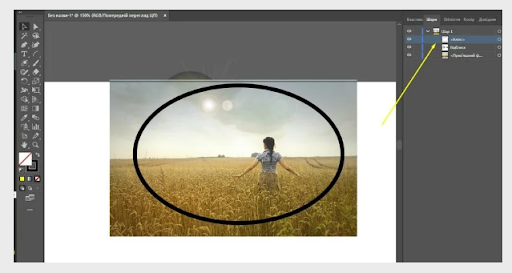
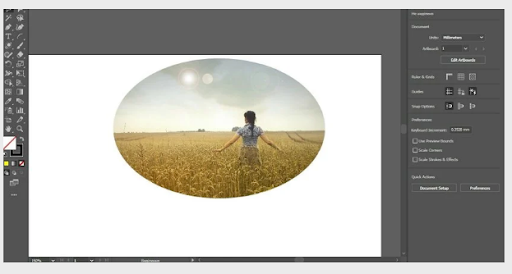
You can create a clipping mask in Illustrator using several techniques. One is to right-click on a group of selected objects and then pick the correct option from the list. Alternatively, here’s what you can do. Press the Control+7 shortcut key.
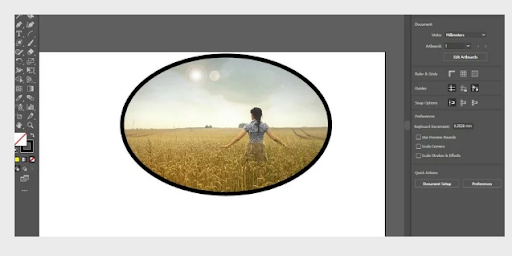
How do you create outlines? Here is another thing you need to focus on. Follow the steps below to create outlines.
First, press Control+Z to deselect. You must copy your ellipse to the clipboard. In this case, you must choose the desired shape and hit the “Control + C” button.
The next step you need to take is to select all the objects again and progress to creating a clipping mask. Note that you’re doing the same thing you did before.
Here is what you need to do to correctly place your copied ellipse with the clipping path on top of the mask.
“Just press the Control + Shift + V shortcut buttons.” Here is the result below.
Conclusion
What is a clipping mask in Illustrator? A clipping mask comprises an object whose shape masks other objects. It ensures only the area within the shape appears visible and ensures the artwork is clipped to the mask’s shape.
Using a clipping mask, you can make designs more eye-catching and unique. You can use it to create unique covers for magazines, music albums, books, posters, and many more.