
Are you seeking basic techniques on how to edit real estate photos? You are in the right place!
Properly editing your clients’ real estate photos will set you apart as a real estate photographer. You’ll make more money because satisfied clients will likely repeat patronage and recommend you to others.
In turn, properly editing real estate images will help your clients sell their properties quickly. And you’ll be given credit for a job well done.
In this post, we’ll discuss techniques you can use to edit real estate photos. Read on!
What Makes Photo Editing Important For Real Estate?
According to the National Association of Realtors (NAR), 97 percent of property buyers search for the properties they purchase online.
Searching online to find a home is more convenient than moving around. With online searches, buyers can save time, money, and gas.
Now, take note of this. The text on your website won’t convince potential clients to purchase your property. What would convince them to take action is the pictures of the property.
Poor-quality photos of your property will pass the wrong message to clients. It might cause clients to rate the property poorly and consider the realtor unprofessional.
So, if you want clients to give your property a high rating and contact you, take your real estate photo editing seriously. Don’t just take photos of the property and upload them online. Edit them thoroughly and professionally to make them look irresistible.
Uploading high-quality and properly edited photos online will make your property look more captivating and get clients through the door. It will convince clients to come around and check the property themselves.
Getting clients to assess the property is a great feat. They might take the next important step, which is to get into negotiation with you and pay for the property. So, ensure you always upload high-quality pictures of your properties online to improve your chances of selling them fast.
How To Edit Real Estate Photos: Steps Explained
We have discussed the benefits of editing real estate photos. Not just any type of editing but professional editing. Now, let’s discuss how to edit photos for real estate.
1: Enhanced photos with color correction:
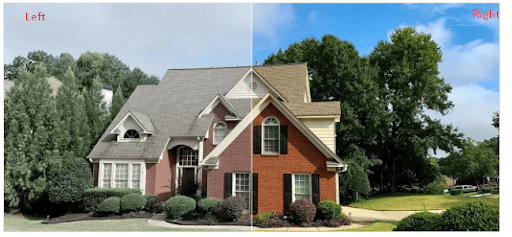
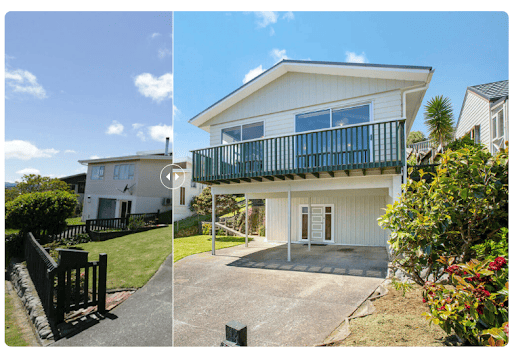
Look at the image above. As a property buyer, which image of the property captures your attention the most? Is it the one on the left or the right-hand side?
The one on the right looks more captivating. It will captivate clients more than the one on the left-hand side. That’s what color correction does. It enhances the color of your property, making it more captivating and sharper.
You can use the color correction feature in Lightroom or Photoshop. Both are great tools. However, most photo editors claim the color correction feature in Lightroom is much simpler to use.
Use the eyedropper feature in Lightroom to improve your property’s image color. Give a more realistic hue to portions of the image that appear neutral or flat.
When you enhance the color of your property photos, you capture clients’ attention and stimulate them to take action. So, improve your photos via color correction.
2: Make your photos sharper and clearer:
Sharpness and clarity are two features you must treat with seriousness when editing your photos. Sharp and clear photos will capture potential client’s attention instantly.
If you’re using Lightroom, note that it boasts a valuable and easy-to-use clarity tool. You can also access the same feature in Photoshop.
In Lightroom, sliding the “clarity slider” is all you need to improve your photo’s clarity. Slide it from left to right. And don’t forget to adjust the black portion of your image, as this helps to sharpen the image and create depth.
A Handy Tip: Ensure the sharpness of your real estate photos is minimal. Uploading extremely sharp photos will distract prospects and pass unwanted messages.
3: Take care of the clutters:
Are there clutters in your property’s pictures that are getting in the way? It is time to declutter the photos.
How can this be done? This is where Photoshop comes in. Just use the clone stamp tool to address the problem. It is simple, quick, and does a neat job.
Photoshop’s “clone stamp” tool will help you clone and eliminate clutter. It does so by painting over the object or individual blocking your main property.
Please get rid of the clutter so prospects can view the entire angle of your property and make buying decisions based on what they see.
4: Address mirror reflection professionally:
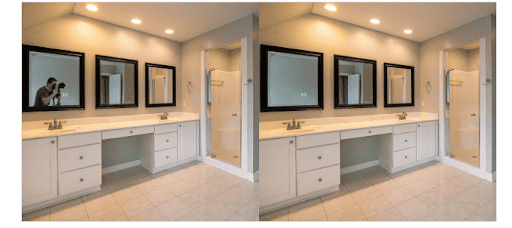
Your clients or prospects want to see the property’s interior that they’ll be splashing their hard-earned money on, not the photographer. So, unless your client is interested in knowing who your photographer is, getting rid of mirror reflections if any exist, is the wisest thing to do.
How can you fix this problem? You can ensure you place your camera at an angle that won’t reflect in the mirror the next time you capture a photo of your property. But if you eventually notice a reflection, don’t panic. Use the clone stamp tool in Photoshop to fix the problem. Just paint over the area you want to get rid of.
5: Perform noise reduction:
Your real estate photo quality can be hampered by noise or grain. We’re not talking about the noise in music or from people talking, but the one that makes pictures appear blurred or hazy. It reduces the quality and clarity of images.
Your photos may likely be noisy because of the camera. It happens most of the time. Two out of five photos you take might be noisy. So, when it happens, don’t beat yourself up.
Just understand that home buyers adore photos that are clear and crisp. They don’t like listings with blurred photos. It doesn’t pass the right message or project to the property owner or realtor as a professional.
Now, enough of the talking! How can one fix noise in a photo? Follow the steps below.
You can do so in Photoshop. Open your Photoshop and hit the “Filter” Menu, then choose “Noise > Reduce Noise and that’s it.
6: Throw in game-changing objects:
Have you ever looked at your real estate photos and thought, “Oh, what if I could add this and that here and there?” If yes, then here’s what you need to know.
Adding certain objects to your photos can have a positive psychological effect on potential real estate clients. It can make them more interested in your listed property and get them through the door.
So, what items can you add to your real estate photo? There are a lot of them. Check out the examples below.
- Fire in a fireplace
- A bench on the front of a patio
- A Vase of flowers on a kitchen counter or dining table
You can even add throw pillows, a TV stand, an aquarium, or any object that enhances the appeal of your property.
Please note that adding objects to photos is a challenging task in photo editing for real estate. You would need a professional for this process.
7: Perform sky replacement procedure:
Even though you’re a highly skilled and talented photographer, you can’t control some things that appear in your photos. One of them is the weather. Some days, it might be cloudy, which might ruin your real estate photo.
You want to avoid listing your property with a dull or unappealing sky over it. It can have a direct negative impact on any property.
So, what’s the best thing you can do about the weather? You can’t control the weather, but you can control how the weather impacts your property. You can use photo editing tools to add a sunny blue sky over your property.
Adding a sunny blue sky over your property will help to brighten up the color and appeal of your property. And your clients will be happy when they stumble on your property photos on the listing site.
You can find a professional photo editor to perform sky-replacement procedures on your real estate property. You need this to be perfect, so you can only attempt it if you have the skill set.
8: Greening the grass & improving the landscape:

A dying lawn on a property can pass the wrong message to home buyers. It can make potential clients assume the property is unkempt and poorly built.
But you can fix this problem using Photoshop or Lightroom. The basic thing you need to do is color adjustment. Fix the color of the lawn.
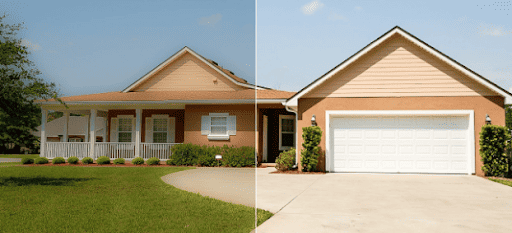
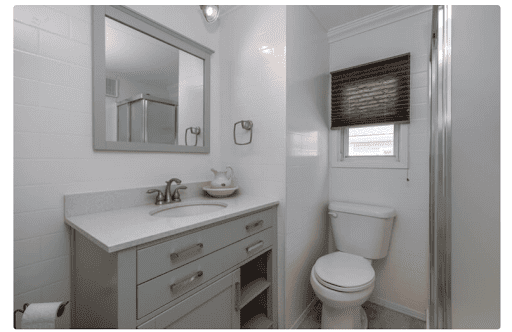
9: Make improvements with window masking:
Check out the photos above and rate both of them. Which of them would you consider if you were a home buyer? Of course, the image on the right looks more appealing.
The photo’s appeal was enhanced using the “Window masking” technique. It’s a photo editing technique that fixes these kinds of issues.
Conclusion
You have read how to edit real estate photos and the benefits of doing so. More than half of home buyers search for their properties online. Thus, they rely on the photos of properties to decide if the owner is worth contacting.
You can improve your real estate photos via various techniques. You can reduce noise, add objects, replace the sky, remove reflection on the mirror, and more.
While most techniques are simple, some are demanding and require professionals. So, investing in real estate photo editing is a wise move. Find a professional to improve your photos and your chances of selling your properties faster.